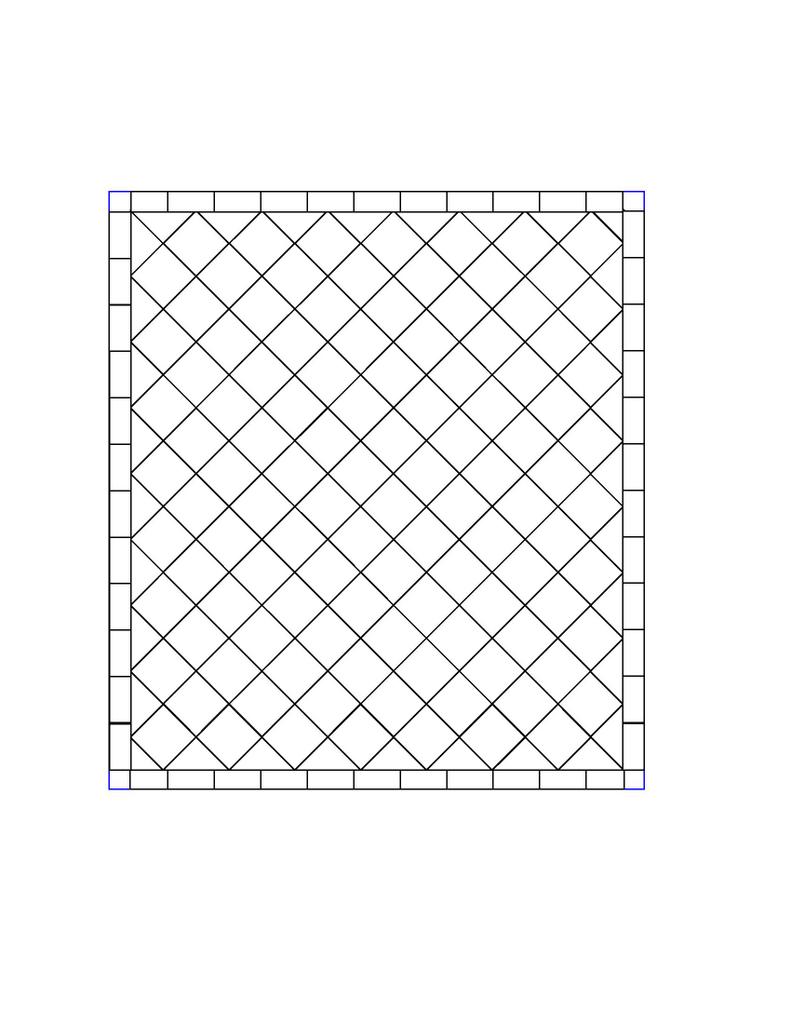
Tile Step 2... Again
After a full day of gluing tile, we're finally done... with the diagonals. We still have the border. This is taking a long time! We cut about 1/4 of the pieces that we need for the border and dry fit them into place. Its around a 6" piece that will go between the diagonal tiles and the wall. But its not very exact. One end of the kitchen is a half inch wider than the other end so we have to compensate. Its pretty much cut and see where it can go. Luckily in the long direction of the floor, the diagonal tiles measure a little over 12'. This is good becuase the tiles are 12" long and with the grout, the spacing is just right... no cutting extra tiles tiles. At the corners of the border we're cutting a square piece for symmetry. The corners under the counter, we don't care so much so the piece before the corner will be trimmed to fit, and the corner will be a square piece. Pretty standard. Check out my layout. =)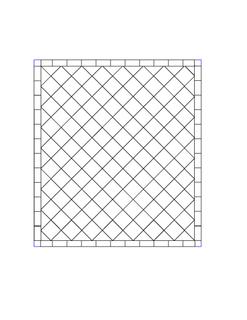
Tile Step 2
All the spacers are in now. All that's next is the adhesive. Glue, notch, placement, leveling. Sounds easy enough, doesn't it. Spreading the glue around is okay, but you always wonder, 'Did I put enough?' Notching is easy until the trowel gets too much goo in the notches and scrapes off too much adhesive so we always have to keep it clear. Placement isn't too bad. I put one edge on and put the spacers then lay it down and put the rest of the spacers in. Sometimes pressing it in and wiggling pushes the tile down too far. So I just softly play it down and use the 2"x4" and mallet to level everything and to squish it into place. And that wouldn't be too hard if all the tiles were exactly the same. But no... they have to be slightly bigger and make the corners not even. It takes some finessing into a good place. We're done with maybe 1/4th of the floor. We've got all of our stuff on the kitchen counter... microwave, toaster oven, rice cooker, tools, buckets, fan. No room for anything. We really need our floor space back. Hopefully we'll grout by Monday.
Tile Step 1
Where to start.... middle sounds good. Laser level... COOL!! We do the corner to corner thing, find the center of the room. Great. Now we have a dot. Hmm. We want to lay the tiles out in a diamond pattern. Let's mark the centers of the 4 walls and do 2 chalk lines. Wonderful. Gee, still need the diagonals. 45-45-90. Okay, that'll work. We finally have a starting line.As we proceed to do a dry layout of the tiles, mixing boxes to mix the patterns around, I realize... some are 1/8" bigger than others. This is going to screw up the spacing. *sigh*. Nothing we can do about it. We only had one bag of spacers so we'll need more but so far it looks great. We got more the next day.Chris' boss comes through with the tiling tools so we try it out. We had about 4 tiles whose corners got chipped off in the box so we use those as a test. Our trim will be straight down the middle but we don't have a straight edge so Chris uses a scrap piece of wood. Score... Snap... Cool... perfectly straight line down the middle. We don't need the $32 tool with the track or the wet saw. Next we try the diagonal. I suggest using the back of the hand saw as the straight edge and that works so much better. The first diagonal score, he slips so there's now 2 lines. He tries using the back of the scoring tool cuz it has the thing like a plier to snap it in half. But the depth of the tool is only a few inches. He puts the tile in the tool. POP! The corner breaks off at about an inch. One edge is along the score line and the other got nipped off by the tool. Maybe we should find another way. So we lay the tile on top of the wood we used as a straight edge. You stand on this half, I'll stand on that half. SNAP!! Right in half. Straight too. We definitely don't need to use the wet saw or the $32 tool.All the diagonals are cut and we start gluing on the tiles from the middle. More tomorrow.
And next we have flooring...
I guess we've been a little busy and haven't posted in a while. Camping was great! Seattle and Canada were wonderful. Now, back to reality.Last week we were hacking away at the old kitchen floor again. On Wednesday we borrowed my brother's truck and got some cement backerboard to lay on the floor under the tile. We needed 14 pieces for the kitchen and hall bathroom. Some tile guy saw us looking at the stuff trying to decide which one to buy. He suggested the hardibacker stuff. And of course, they only have 8 pieces out and 4 pallets worth stacked up. Alright, time to call the Home Depot guy over. They barricaded the area and got the fork lift to bring a pallet down for us. It took a while but we finally got our backerboard loaded and unloaded. Now its sitting on the deck waiting for us to get the floor ready for it.
Thursday we finally moved the fridge and stove out of the kitchen. We took the door off between the kitchen and laundry room. It was going to be a tight squeeze for the fridge. It has wheels, but they only go forward and back, no sideways. So we positioned it to the door and it just fit....except for the handle. DOH!! We can't unscrew the handles cuz they're glued on at parts. So we pivot. And of course its not that easy. There's a bracket thing in our way. Its for if we had an ice maker, it keeps the hoses in place. Screw driver... where's a screw driver? So we take off the bracket. Another problem was the wheels. It wasn't going to go sideways through the door and over the threshold and it was a little too heavy for me to lift. So we used a piece of cardboard to slide it over the threshold and pivot it so the handles fit too.

Phew! Finally out.
It'll be fun putting it back in. Hopefully there'll be other people to help us when that time comes. The stove was much easier.
I had the day off on Friday so I spent the whole day with the paint stripper. I was able to finish the last half of the first window and 3/4 of the second window. That took 8 hours. Sheesh. I still have that 1/4 of a window and 3 more windows to finish. This will take a while. But it looks decent when I'm done. Then we need to sand, prime, and paint them. We gave up on stripping the windows from the other rooms. It takes too long.

Chris won't be back form Seattle until tomorrow night so we'll see how much I get done while he's gone.
What a bright idea...
So its been a week since our last post. I guess we got busy. Well, the elder Franciscos have been visiting us for the last week and a half. They get to go home today. Chris' dad has been a lot of help installing the rest of the electrical wiring in the ceiling for our lights. Chris' mom helped us with the shelf liner in the kitchen and amazingly chipped off like 5-6 rows of kitchen floor for us too!! Great job!! We just have the stuff that's the fridge and stove are sitting on.We finally decided on lighting. We're putting at least three 5" recessed lights in the kitchen and a ceiling fan in the living room and master bedroom. There's one more space above the kitchen sink but the crawl space is too small to work in that corner of the building. Well have to install something from under the ceiling. We also obtained two 6" recessed lights from Chris' great auntie Tess. We might put those on either side of the ceiling fan in the living room. Here's some pix. This is the one for the bedroom. Its a 42" blade surface mount for smaller rooms.
 This one will go nicely in our living room. It has a 52" blade but we'll probably surface mount it as well. Our ceiling height is only about 8" and they say you should have at least 7" between the blades and the floor. Its just the right size.
 The recessed lights are pretty simple. But since we can't put it above the sink, we have to find something else. We moved the the placement of two if the fixtures so I had to do a patch job. Its more difficult doing it on a ceiling upside down. I'd hate to have been Michaelangelo doing the Sistine Chapel. But we got our patches in place and no one will be the wiser once its finshed and painted.
 We were thinking of putting these in our laundry room. They have some matching singles for our mudroom that might do just fine.We also started attempting to strip the paint off of the window frames. Let me tell you... its a pain in the buttox. You slather this stinky jelly consistency stuff on the wood, wait... but don't wait too long, then scrape scrape scrape. If you wait too long, it'll harden. If you don't wait long enough, it wouldn't've done its job yet. All the while with a respirator on so you don't pass out from the fumes. So you're breathing like Vader with rubber gloves and this plastic putty knife or stiff brush, scraping away at this gunky stuff that doesn't want to come off and its water based so it starts bringing up the grains of the wood and your knife keeps catching on the grain to the point where you think the wood is going to chip off if you press too hard but if you don't press hard enough the paint won't come off. *sigh* We gave up. We did half a window and cleaned up. The other two windows has dried on paint stripper so those 3 windows are the only one's we're stripping paint from. The others will get a TSP bath, maybe some light sandpaper, primer and paint.
 Oh yeah, we got our baseboards over the weekend as well. A friend of a friend is getting us a deal (hopefully). We went to pick it up the Friday before the 4th and there was a goof in the price. So they called people and finally decided to just let us take the baseboards home and they'll work out the price on Tuesday. Well, its Friday again and I haven't heard anything about the price. Hopefully its still the discounted price. But the wood is supposed to be higher quality but at Home Depot prices, so if they charge us full price, I don't mind paying for the better stuff.Hmmm.... what else. I finished texturing the master bedroom and we started priming the pink walls. It took a few coats but it's covering pretty good. I think the nap of the roller was too short, so we bought a bigger one. It should work better to get in the crevices of the texture. We might start priming the living room soon too.Now we're taking the weekend off and going camping.


